Monday, September 15, 2014

Distress Inks + Inlaid Die Cutting (SSS Monday Challenge)

This week's Simon Says Stamp Monday Challenge is called Rock The Techniques. Yay! I love doing techniques! This is my first challenge, so here it goes!

Today I made a thank you card for my grandma- her all time favorite color is blue :)

I started out by making the background on a piece of 4.25"x 5.5" Strathmore watercolor paper.
I used a stencil from Memory Box called Texture Tessatina and added some Distress Inks over it using mini ink blending tools. The Distress Inks I used, from top to bottom are: Tumbled Glass, Broken China, Peacock Feathers, Salty Ocean, and Seedless Preserves. Then I sprayed the heck out of the top portion of the background with water so it would drip down and leave water marks. You know how rain looks when it's running down a window? That's the look I was going for. 

Next I did some die cutting: I used the Spring Showers Die Set from Lawn Fawn to cut out the cloud and the rain drops. I cut another stitched cloud out of some white chipboard (or super thick cardstock? I'm not really sure what it is, but I used it :P) and glued it down with some Multi Medium Matte slightly overlapping the cut-out cloud and right above the rain drops.

I cut the panel down a little bit, taking about a quarter of an inch off of each side and adhered it onto an A2 sized card made from Neenah Solar White 110 lb cardstock using some foam tape. Then I inked up a piece of scratch white cardstock with Peacock Feathers Distress ink, put some clear Wink of Stella over it, and heat embossed some clear embossing powder over that. I used the rain drop die again to cut the drops out of that scrap paper. I stuck the little rain drops into their coordinating cut-out spots with my Pick-Me-Up tool from Silhouette and used the Multi Matte Medium to stick them down to the card base behind the panel.

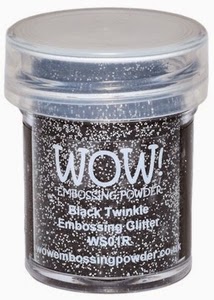
My card was looking like it was missing something, so I decided to add a sentiment. I used the Chalk Talk stamp set from Stampin' Up, stamped the "For You" onto that white chipboard with some VersaMark ink and sprinkled some silver tinsel embossing powder from Recollections over it. (The silver tinsel embossing looks way more glittery irl). I heat set it and then cut it out using my Circle Stackables dies from Lawn Fawn. Glued it down onto the card using -you guessed it- Multi Medium Matte and the card was done! 

Thanks for visiting!

-Erica

Sunday, September 14, 2014

Heat Embossing + Distress Inks

Hello! Thanks for visiting! I am starting this blog because I love papercrafting (and pretty much any other kind of crafting/design related stuff) and I was inspired by Kristina Werner and Jennifer McGuire. I love watching their videos and reading their blogs, so I thought I would start one of my own!


Today I made a thank you card for one of my co-workers using one of my favorite background stamps by Hero Arts.
I started out with a 4.25" x 5.5" piece of Strathmore watercolor paper and blended some Distress Inks onto it with a mini blending tool. The colors I used are Picked Raspberry, Mustard Seed, Tumbled Glass, and Peacock Feathers. I'm loving the mini sized distress inks! Then I used an anti-static powder bag and rubbed it over the paper before stamping my background stamp onto it with some VersaMark ink. I spread some Charcoal embossing powder from Recollections over it. (Yeah I know, Recollections...but their embossing powders actually work really well for me) :)
I misted some water over the background to give it some water spots. 
The next step was to cut out the center of the paper with a Lawn Fawn Circle Stackables die. The "Thanks" die is also from Lawn Fawn. For that, I die cut the sentiment, then stuck it onto a piece of scrap paper with some removable adhesive. Then I inked up the die cut with some VersaMark ink, poured the same Charcoal embossing powder over it, and heat set it. To give my "Thanks" embellishment a little more dimension I used a technique that I saw Jennifer do in one of her videos: I put a couple layers of clear embossing powder over it instead of using Glossy Accents. I then adhered the embellishment to my background using Multi Medium Matte from Ranger. I added the panel with some foam tape to an A2 sized card made from Neenah Solar White 110 lb. cardstock.

I like how it came out. Clean and simple cards are my favorite! Thanks for reading! Hopefully I will have many more crafty blog posts to come. :)

-Erica


SUPPLIES
Distress Ink Pad Mini Kit #8
Distress Ink Pad Mini Kit #1
Mini Ink Blending Tool
Hero Arts Tiny Flags Background Stamp
Lawn Fawn Scripty Thanks Die
3M Foam Tape

Recollections Anti-Static Bag

Martha Stewart Heat Tool

Ranger Multi Medium Matte

Neenah Solar White Cardstock 110lb


VersaMark Ink Pad
I couldn't find the Recollections Charcoal Embossing Powder, so I linked to some other black glittery embossing powder.
WOW! Black Twinkle Embossing Powder